

In this comprehensive guide, we will take you through the step-by-step process of how to install a Wisniowski sectional garage door. So let’s dive in and get your garage door installation journey started!
Understanding Sectional Garage Doors
Before diving into the installation process, it’s important to have a clear understanding of what sectional garage doors are. Sectional garage doors are made up of separate horizontal panels that are hinged together. These panels allow the door to open vertically, which saves space both inside and outside the garage. Sectional garage doors are known for their durability, security, and insulation properties.
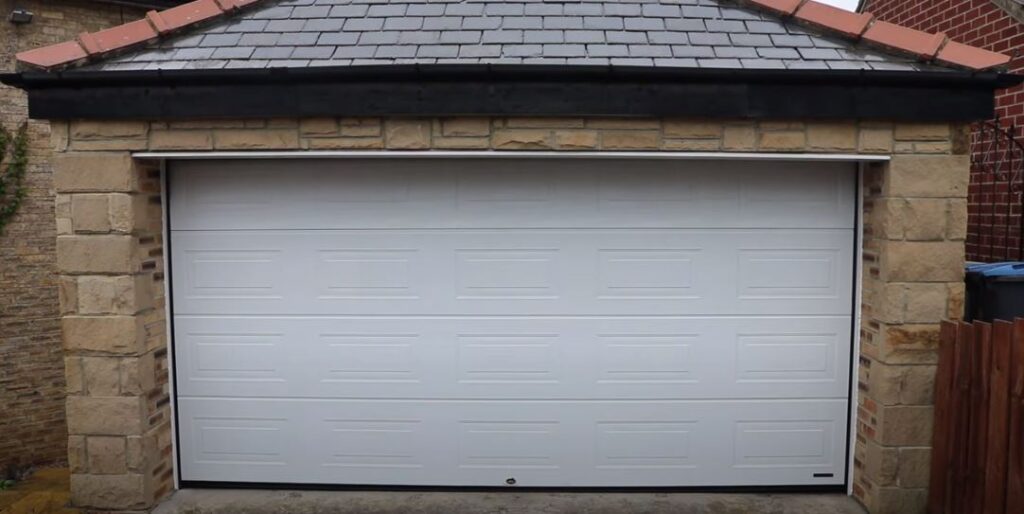
At JDUK, we supply two different types of sectional garage doors, our Wisniowski garage door and Pro Plus sectional door. In this guide, we’ll talk you through the installation process of our popular Wisniowski garage door.
Step-by-Step Guide on How to Install a Wisniowski Sectional Door
Step 1: Fix the Frame Leg Seals
Lay out the frame legs flat on a set of tressels. Align the channel on the side seal with the edge of the edge of the frame leg. Starting at the bottom, apply pressure on the side seal until it fits completely over the frame leg.
Then, grip and fold the side seal in towards the side of the frame leg until you hear a click. Do this for the full length of the seal. Repeat the process on the opposite frame leg.
Step 2: Fix the Frame Leg Cover Profiles
Select the nuts and bolts and angled brackets from the fixing kit. Thread the bolt through the predrilled holes on the frame leg, on the outside of the frame leg, place a right angled bracket on the bolt before fixing the nut loosely.
Repeat this for all of the required right angled brackets. Loosen the bolts on the connecting plates and angled brackets to allow the cover profile to slide underneath. Leave the bolt towards the bottom of the frame tight to keep the pitch of the vertical track correct. With all of the protective film removed, place the folded length of the fascia over the frame leg seal. Work your way along the leg making sure that all brackets are positioned over the facia.
Tighten all of the bolts so that the fascia sits securely along the frame leg. Repeat this for the other frame leg.
Step 3: Fix the Legs to the Header
Attach the rubber seal to the header, the same way as the frame legs, making sure to press down until you hear a click. Turn the header upwards and place the fascia along the length of the header making sure it doesn’t overhang.
Peel off the protective film before fixing. With the fascia in position, begin to fix the right angled brackets along the length of the header. Make sure that the bolts are tight so there’s no movement in the header.
Lay each of the frame legs flat on a set of tressels ready to fix to the header. Select the nuts and bolts from your fixing kit and overlap the header with each frame leg until the predrilled holes meet. Thread the nut through the top of the frame leg and the inside of the header and fix the bolt using a spanner to tighten.
Repeat this process on the other frame leg so that the frame of your sectional door is ready to be fix to the opening.
Step 4: Fixing the Frame
Always make sure that the opening is clear and free from any debris. Lift the frame into place within the opening and secure using clamps on either side. Use a spirit level round the frame to check that it is level and plumb.
Using appropriate fixings, secure the frame to the structure. We recommend using the fixings provided wherever possible.
Layout the tracks on a set of tressels and assemble the tracks using the nuts and bolts provided in your fixing kit. Place the curvature jointed plate behind the track so that the holes align and fix using bolts. Turn the tracks face down and remove the bolts from the end. Place the back bar right angled bracket against the back and replace the bolts, tightening with the spanner.
Repeat this process with the other set of tracks so they’re ready for installation.
Bolt the curve tracks into place on either side of the frame using the predrilled holes and bolts provided. Lift each of the horizontal tracks into position and fasten using the bolts provided, making sure that the tracks are level before tightening the bolts.
Step 5: Fix the Back Bar and Hanging Straps
Start by laying the back bar flat on a set of tressels. Locate the hanging straps and fixings from your fixing kit. Slide the metal plate with the two threaded holes into the end of the end of the backbar and cover with the c-bracket so that the holes overlap.
Place the hanging strap over the top and bolt all three together loosely. Slide the hanging strap into the back bar and repeat with the other end. Hold the back bar into position at the end of each horizontal track and fasten with two 10mm bolts on either side.
Push out the hanging strap on either side of the back bar, until they reach the wall. Use the spirit level to ensure the tracks are level before fixing the straps to the wall. We recommend using the fixings provided wherever possible. If the arms don’t reach the wall, they can alternatively be hung from a suitable area on the ceiling. Check levels again and use a tape measure to measure from the corner, ensuring that each side is equal. Once the measurements are equal, tighten the bolts on the back bar hanging straps. Once everything is square and level you can begin to fix intermediate hanging straps using the hook-on brackets provided. Bolt the strap to the hook-on bracket at the required height setting and fasten strap to ceiling using screws.
Bend the two edges of the hook-on bracket over the edge of the top track using pliers. This will secure the bracket to the track.
You can then trim any excess off the hanging straps.
Your frame is now securely fitted and ready for panel installations.
Step 6: Attaching the Panels
To prepare each intermediate roller bracket, slide the sleeve over the shaft of the roller with the narrowest end of the sleeve to the roller. These will later be fixed to the intermediate door brackets.
Place the plastic block over the slots on the roller bracket so that all holes line up.
Slide the cast end of the cables over the roller shaft and then slide the roller shaft through the holes in the bracket.
For ease, place the fixings on the correct sides of the frame before beginning to install the panels. Always remove any protective foil from each panel before installing.
Place the first panel within the opening and line up the bottom roller bracket with the pilot holes at the bottom edge of the panel. Fix into position with the screws provided and repeat with other end of panel.
Line up the intermediate roller bracket with the pilot holes at the top edge of the panel and fix with the screws provided.
Bolt the intermediate roller to the door bracket with the bolts provided. When tightening the roller bolts make sure that the rollers are not too tight in the tracks. Repeat this with all other intermediate rollers.
Screw the intermediate hinges to the top edge of the panels with the screws provided noting that the small leaf of the hinge goes to the bottom.
Lay down foam blocks and bring the remaining panels into the garage, making sure to remove protective layers as you go.
Now place a few provided packers over the top edge of the panel and place the next panel on top.
Fix all of the brackets and hinges into place as per the first panel. You can then fix the two panels together and repeat this process until all of the panels are in place within the frame.
With the top panel in place put your short rollers into the top roller brackets and screw them to the top of the panel.
Note for manual doors keep the top roller low in the track and for automated doors keep the top roller high in the track.
Your panels are now fitted.
Step 7: Prepare the Cables
Manually lift the sectional door panels and clamp in position on either side.
Making sure that the cables aren’t crossed, thread over the wheel at the top of the frame leg and through the pully wheel on the end of the spring.
Thread the ends of the cable into the cable-holder at the top of the frame leg.
Pull the spring downwards and hook the base of the spring into the appropriate slots at the bottom of the frame leg.
Repeat this with the other side before manually testing the door.
Once you’re happy with the operation of the door, secure the base of the springs with screws provided.
Locate the wheel cover plates from your fixing kit and place over each of the wheels at the top of the frame leg. Fix into place using the screws provided.
Finish by placing the plastic caps over each of the pully wheels at the top of the springs and clicking into place.
For automation, please refer to the manufacturer’s recommendations. There will be two black c-shaped plastic strips in the hardware box, which are for manual doors, these are to be fixed to the top far end of the horizontal tracks to secure the door when at full drive through height. After installation, if needs be, seal around the frame with silicone sealant.
That’s how to install a Wisniowski sectional door! Your door is now fully installed and ready for use.
For a more detailed version, see the below video.
Need Help with How to Install a Wisniowski Sectional Door?
By following the step-by-step instructions provided by the manufacturer and understanding the installation method, you can successfully install a Wisniowski sectional door that meets your specific needs. If you encounter any difficulties or are unsure about any steps, contact us at JDUK on 01924472924 to ensure a safe and efficient installation. We’re always happy to help!
Happy installing!